-
I started off this project by
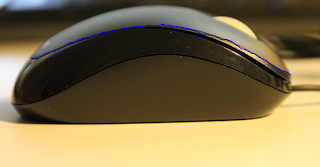
drawing the shape of the mouse that i wanted; i sketched out the side view,
including the roller wheel, followed the bottom view then a bottom view of the
mouse button cover. The mouse is designed to be sleek and organic. This mouse
has 3 parts; a lower, middle and upper housing; with the same 3 components that
were used in the previous task.
Profile Images:
 |
| Mouse Side View |
 |
| Mouse Button Cover |
 |
| Mouse Bottom View |
I used the same process for the lower as the previous task for modelling
this mouse. I inserted the sketch
pictures into Solid Works and used centre lines to set the correct size of the
mouse. I used the spline tool and traced one side of the sketch then mirrored
it to ensure symmetry. I then traced the
side spline which i will project to make the top profile for the loft. When i
tried to project this curve it didn’t complete. So i had to make a different
profile which i would use for project curve; one that stopped shorter so i
could make line up with the picture.
Lower Housing Surface:
 |
| Completed Lower Housing |
I did the middle and upper step using a surface fill; with
constraint curves I used the spline tool to create height and the shape of the
part. I then used to profiles to control the width. I then used the filled surface tool which
made the shape. At first I had a few problems creating this surface fill.
However I managed to fix as the lower housing spline finished as a point, not a
curve; changing this fixed it.
I then made a spline on the side view which i extruded both
ways so i could trim the upper part of this housing off to make a better fit
for the mouse button cover.
 |
| Split profile for middle housing and mouse button cover |
 |
| Finished Middle Housing |
I then made two another spline on the side view, and another
front view which I used to create another filled surface, this created the
mouse button cover.
 |
| Mouse Button Cover |
 |
| Finished Mouse Body |
After i had finished creating the mouse body i split all
bodies and inserted them into new parts. I then inserted the parts into an
assembly including the circuit board, mouse wheel and reflector. Once all the
parts were in the assembly, I then starting adding all the inside supports and
connections i did most of this inside the assembly however every time i changed
a part the model in the assembly turned yellow. I added in a few connections on
each part to make the part work. Some of the interior parts were based off the
old model but the style was changed in order to fit the design. Overall the
model was a lot easier to model this time around as i knew what problems to
look out for.
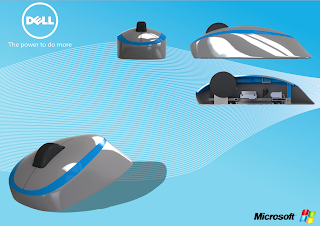
Finished Rendered Model:
Rendering this time around was a lot better; i used a higher
resolution and better studio lighting. This gave a nicer image and better
reflections. I did 8 overall renders showing the different views and sections
of the mouse. The presentation board looks a lot better this time; i used a
combination of Adobe Photoshop and Illustrator for the background, and just
made a simple presentation page showing the views of the mouse with a section
view.
Finished Photo board:


